If you’re using Windows Live Writer with a custom designed theme the blog theme template sometimes doesn’t work correctly. I’ve had this issue a while back and just fiddling around I accidently got it working but wasn’t sure of the steps I followed at the time. Among the things I tried – which didn’t work for me – were using the ThemeFixer tool which you can grab from https://blogs.msdn.com/b/brandonturner/archive/2009/08/16/broken-theme-in-windows-live-writer-you-can-fix-it.aspx. After upgrading to Windows 8 and installing Windows Live Writer again I started having the same issues but this time I managed to fix the issue by doing the following.
Step 1: Multiple attempts to add/remove my account in WLW and update the blog theme
This didn’t work, so save some time and don’t try it.
Step 2: Tried ThemeFixer
As noted above, this also didn’t work for me so it may not work for you too.
Step 3: Publish a draft post to the blog
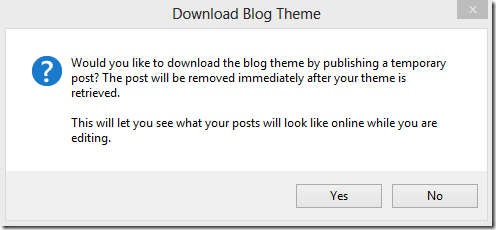
After failing step 1 & 2 I thought maybe if I post a draft to the blog from WLW it might detect the correct theme layout. This didn’t make a difference but when I did this I recalled that when the issue got resolved last time I saw the following popup display.
It turns out that if you post to your blog from WLW and then go to the blog settings and update the theme the issues go away! The actual theme may not display for you in Edit mode but it will still work fine and display correctly when you go to Preview in WLW.
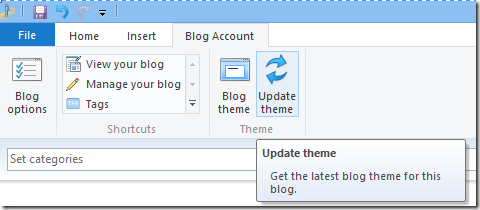
Step 4: Update blog theme after posting a draft to your blog
Once you post your draft to the blog the last thing remaining is to update your blog theme in WLW again.
Step 5: Done! You can now start writing, editing and posting!

